
Last year I got to do a pattern review for issue 77 (February 2020) of Love Sewing Magazine. I made the garment at home, wrote a pattern review, and then I was invited for a professional photoshoot! It was such a lovely experience and even though the pattern review is already out there in the mag, I thought it was fun to blog about the whole process.
It all started when I was chatting to Amy from Almond Rock (who at the time was the editor of Love Sewing). I mentioned that I always loved reading the ‘Reader Reviews’ and that I would love to be considered for a future issue. A few months went past, and I had totally forgotten about the conversation until Amy got in touch with me at the beginning of November last year. A last minute space had become available and she asked if I would like to make McCall’s 7120 and come to the photo studio in Stockport for a photoshoot. Of course I said yes!

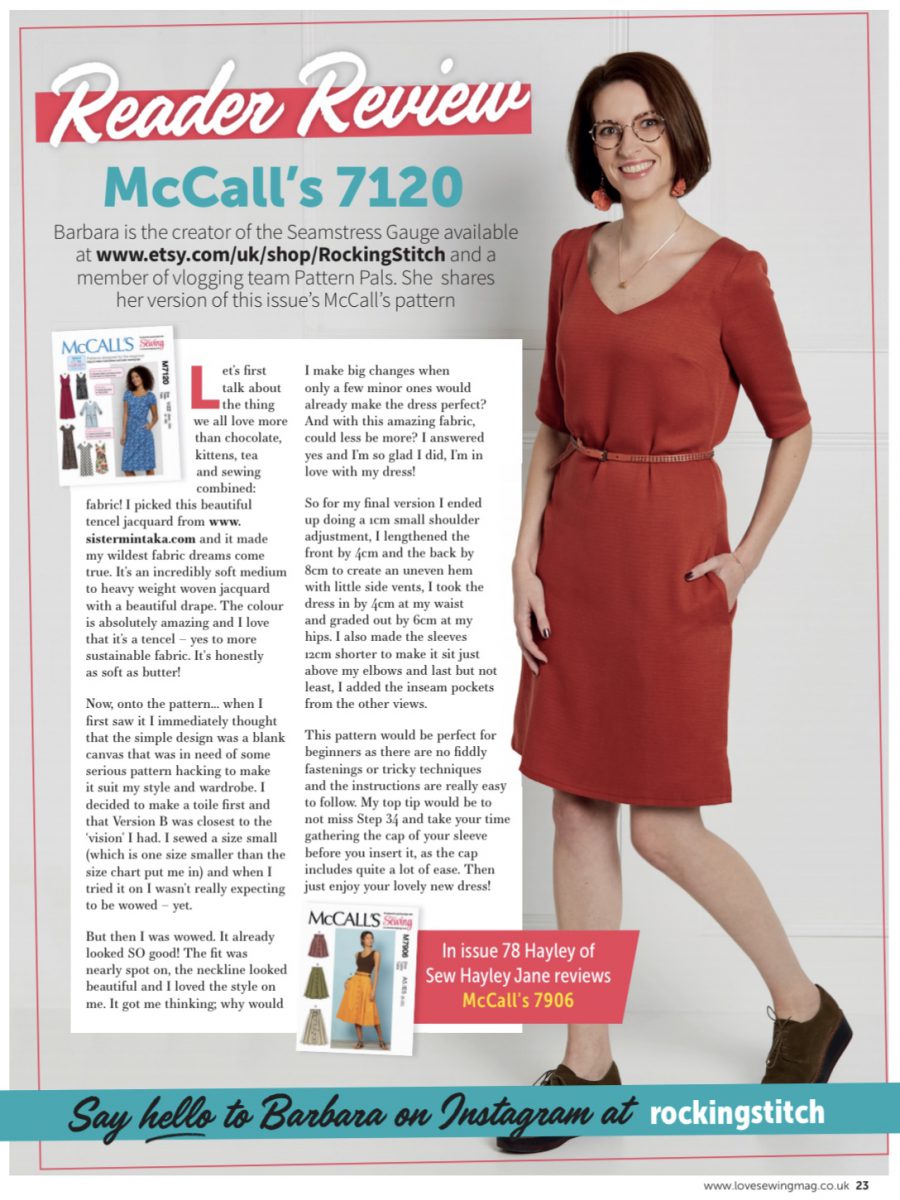
McCall’s 7120 was the pattern that was included with Love Sewing issue 77, therefore I was asked to make and review that specific pattern. It was sent to me for free, as well as the most delicious fabric – which I got to pick myself! After visiting some of my favourite online fabric shops I chose this tencel jacquard from Sister Mintaka. When it arrived I was blown away by the feel and quality of this fabric. It’s an incredibly soft medium to heavy weight woven jacquard with a beautiful drape. The colour is absolutely amazing and I love that it’s TENCEL – yes to more sustainable fabrics.
I sewed the dress in a few evenings (more on that below) and a few weeks later I jumped on a train to Stockport. The journey was no joke.. It took me over 3 hours to get there! But, once arrived I was warmly welcomed by Amy and her lovely team, which made it all better. Whilst Amy steamed some crinkles out of my dress, the lovely Yasmin made me look all glam. There is something special about having your hair and make-up done professionally and I really enjoyed the transformation!
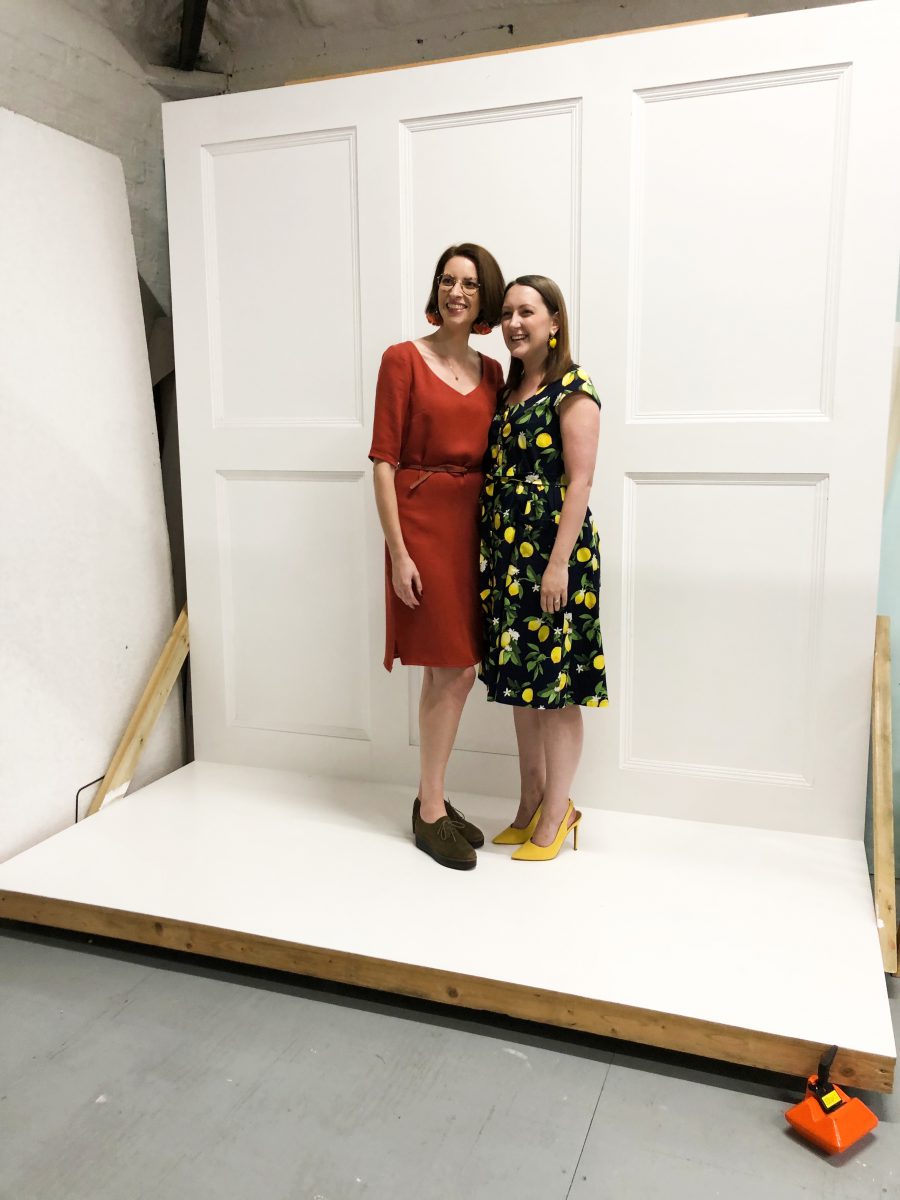
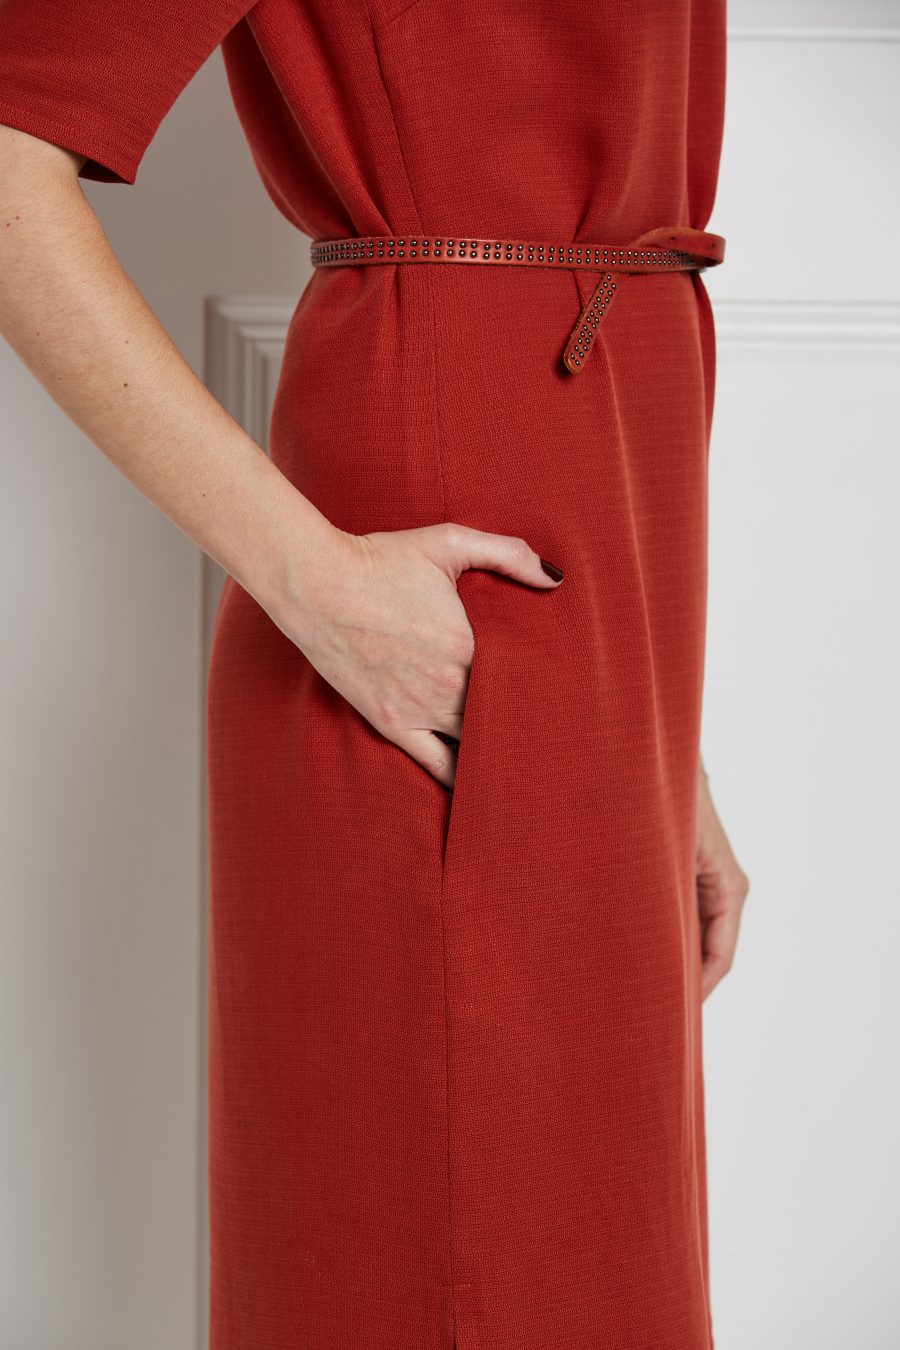
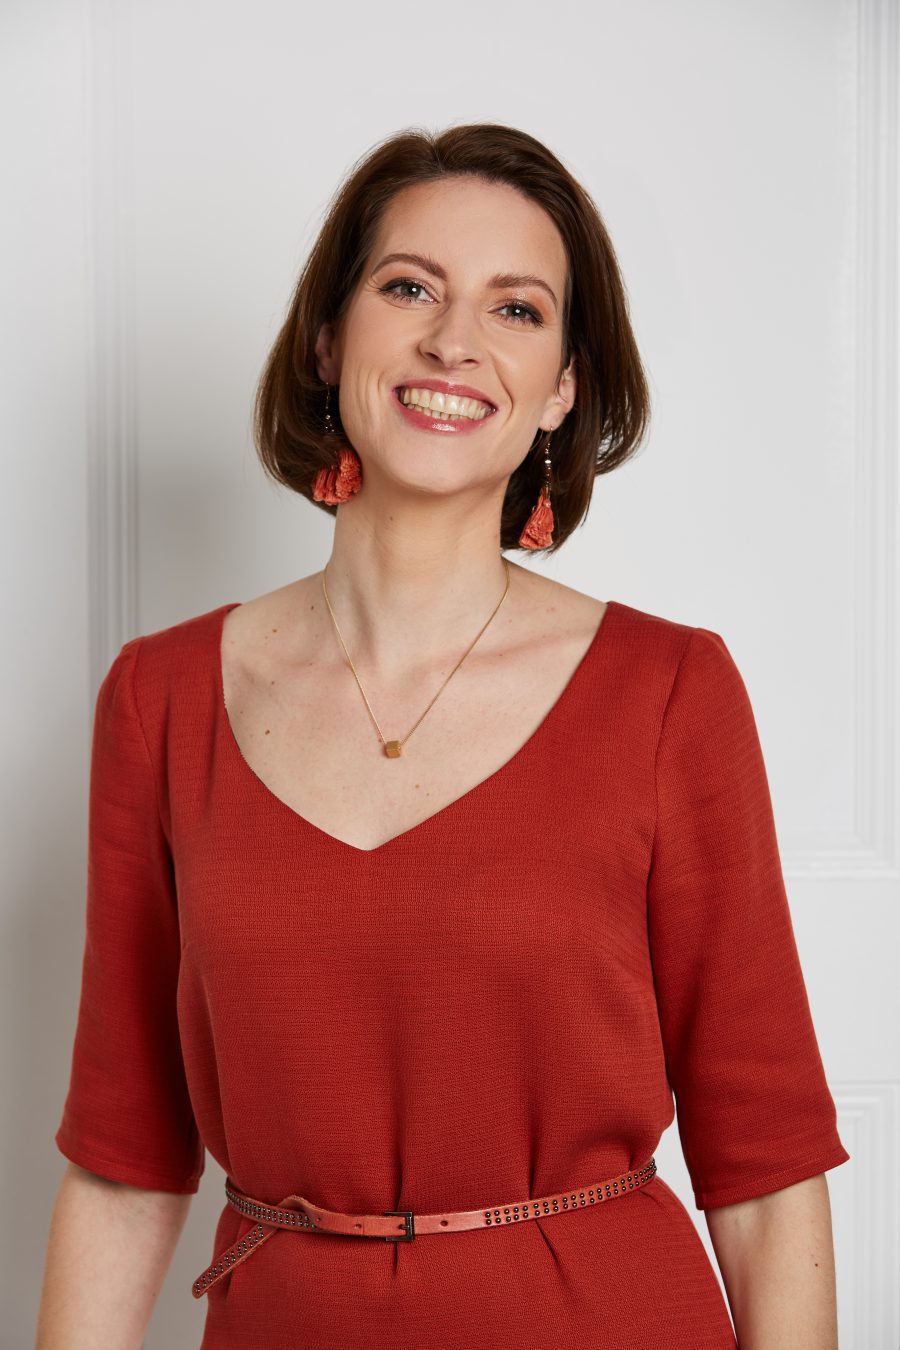
Then it was time for the actual shoot. I felt pretty awkward in front of the camera at first, but after a few minutes I started to really enjoy it and I was posing like a pro (haha, not really!). The photos were instantly displayed on a screen near me so every few minutes we took a quick break to see what worked and what didn’t work. We needed a full body shot for the feature, but the photographer also offered to take some extra photos for personal use. She took some detailed shots of my dress and some head shots which I included below. I can’t remember how long it was before we had a few good options ones to choose from, but it must have been around 30 minutes.
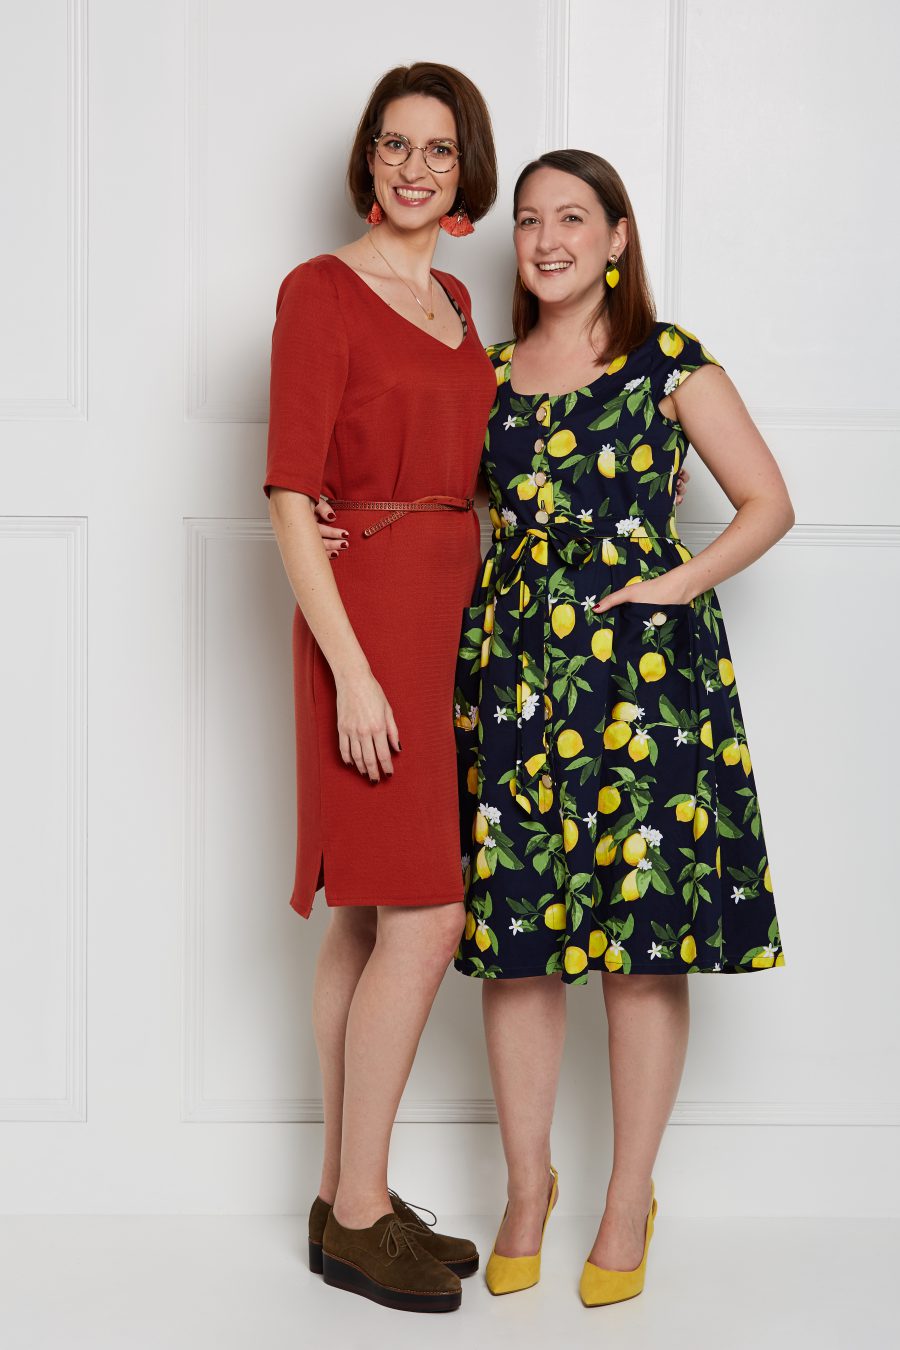
We then took some photos of me and Amy together. The first page of the magazine always includes an introduction from Amy – including a photo – and a bit more about what you can expect to see in the magazine. We had a good laugh when posing together, this is actually harder then it looks! After we were both happy with the results it was time to call it a day. I thanked everyone for the super fun shoot and I jumped on a train back to London.
Now, onto the pattern… When I first saw it I immediately thought that the simple design was a blank canvas that was in need of some serious pattern hacking to make it suit my style and wardrobe. I decided to make a toile first and that version B was closest to the ‘vision’ I had. I sewed a size small (which is one size smaller than the size chart put me in) and when I tried it on it already looked SO good! The fit was nearly spot on, the neckline looked beautiful and I loved the style on me. It got me thinking; why would I make big changes when only a few minor ones would already make the dress perfect? And with this amazing fabric, could less be more? I answered yes and I’m so glad I did, I’m in love with my dress!
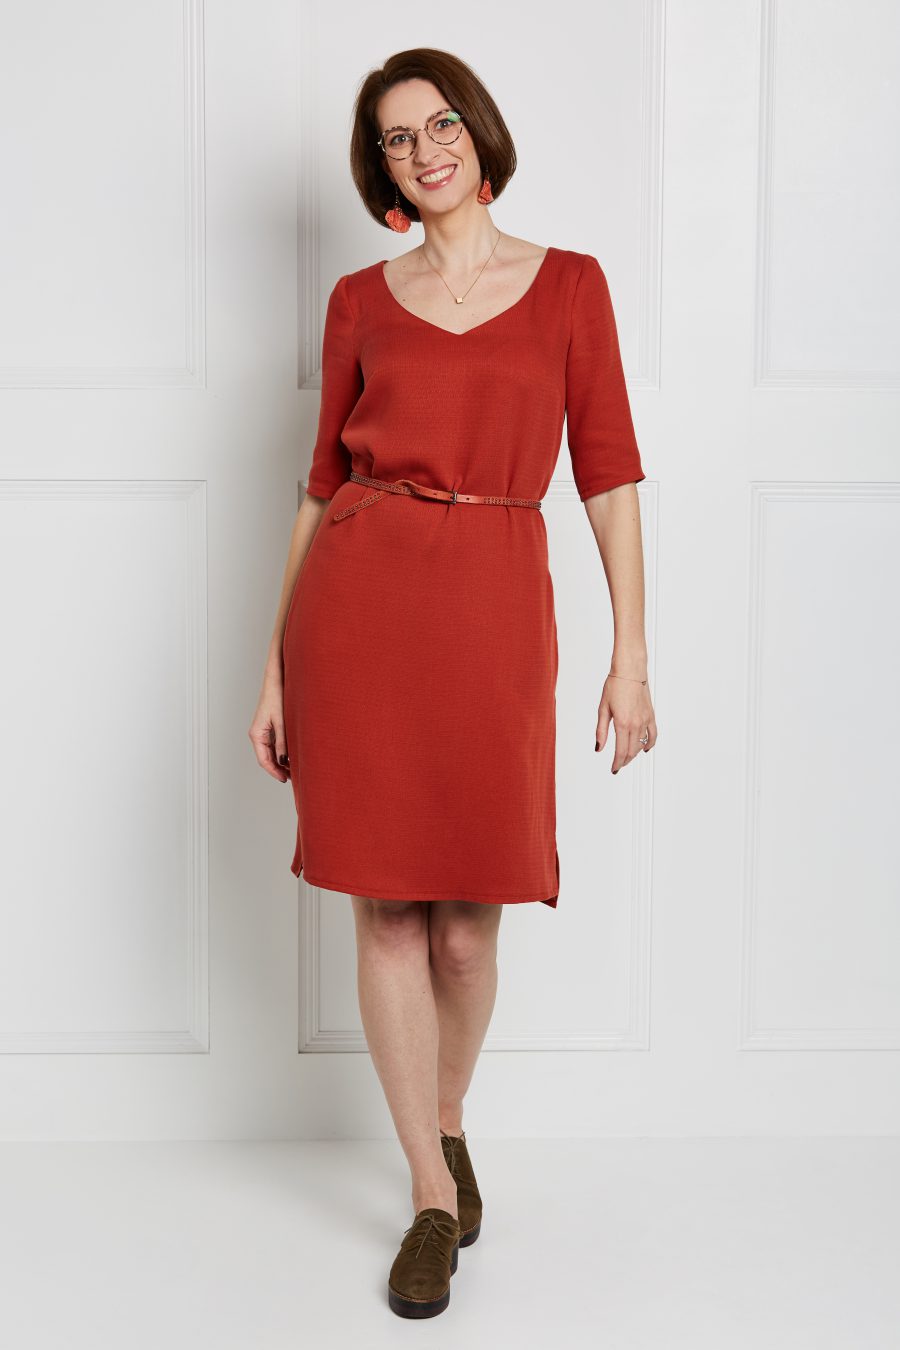
For my final version I ended up doing a 1 cm small shoulder adjustment which is a very common adjustment for me. I needed to add length (another common one fore me – I’m 180cm tall), so I lengthened the front by 4 cm and to add a little interest I added 8 cm to the back to create an uneven hem with little side vents. I improved the fit further by taking 4 cm in at my waist and I graded out by 6 cm at my hips. I also made the sleeves 12 cm shorter to make it sit just above my elbows and last but not least, I added inseam pockets!
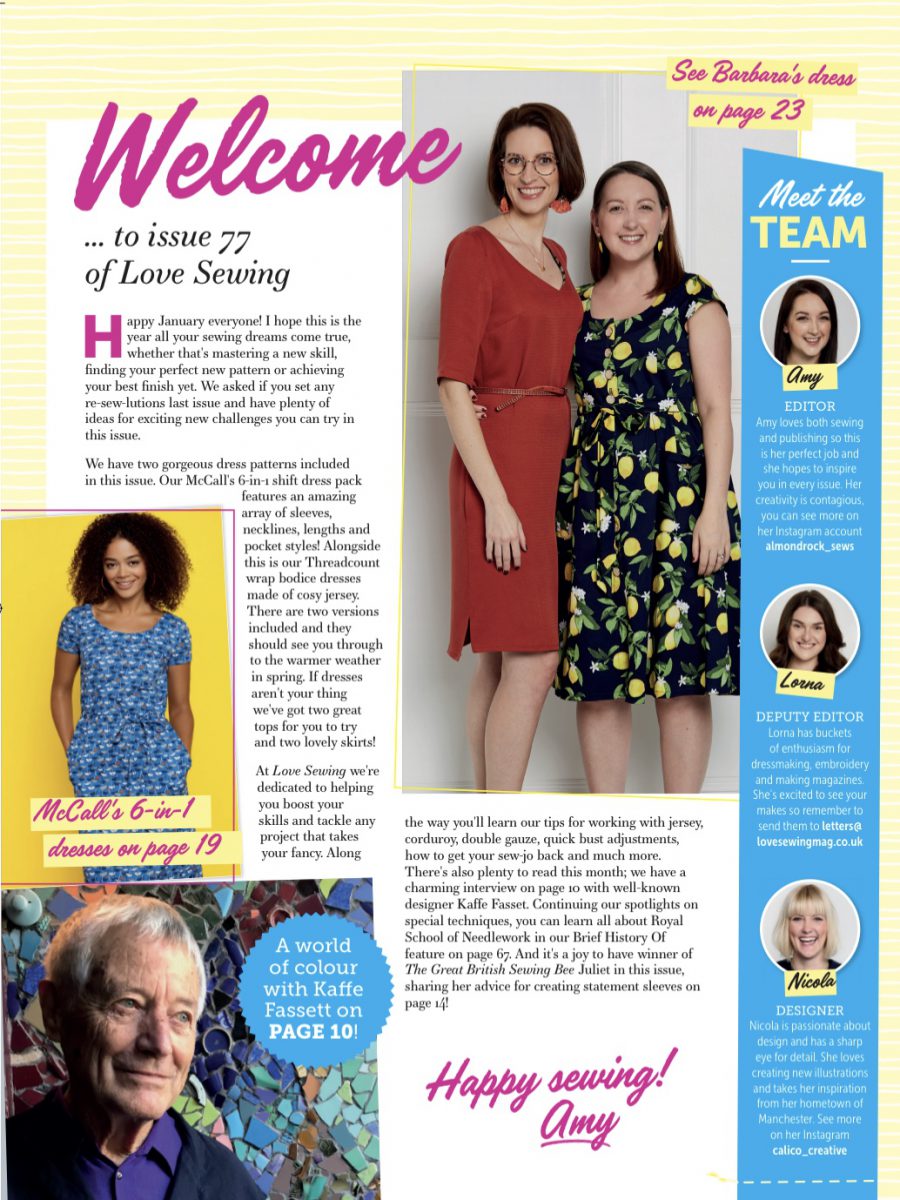
Below you can see what the final page in Love Sewing looked like! It’s really fun (and a bit weird) to see yourself in a magazine. I found the whole experience really special and I feel really lucky that I was able to do this just before we moved to Oslo. I have been featured in magazines before, but not like this, and the photoshoot is just one of those things I’ll always remember!
Here are some of the close-ups. My glasses were often reflecting the lights in the studio so I had to turn my head in a slightly awkward way for it not to happen. After a few trials we tried to take a few shots without my glasses on, but we decided against it as it didn’t really feel like ‘me’.

That’s it, a little peek into my one page of fame! Thanks for reading, till next time. Barbara X