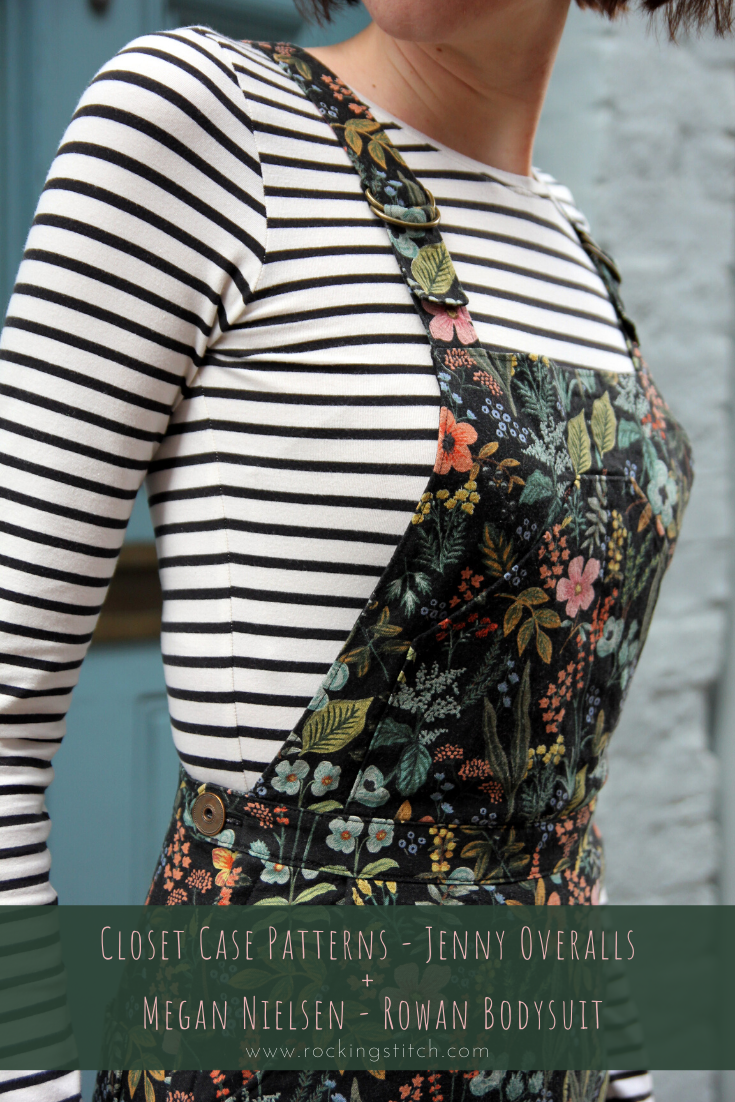
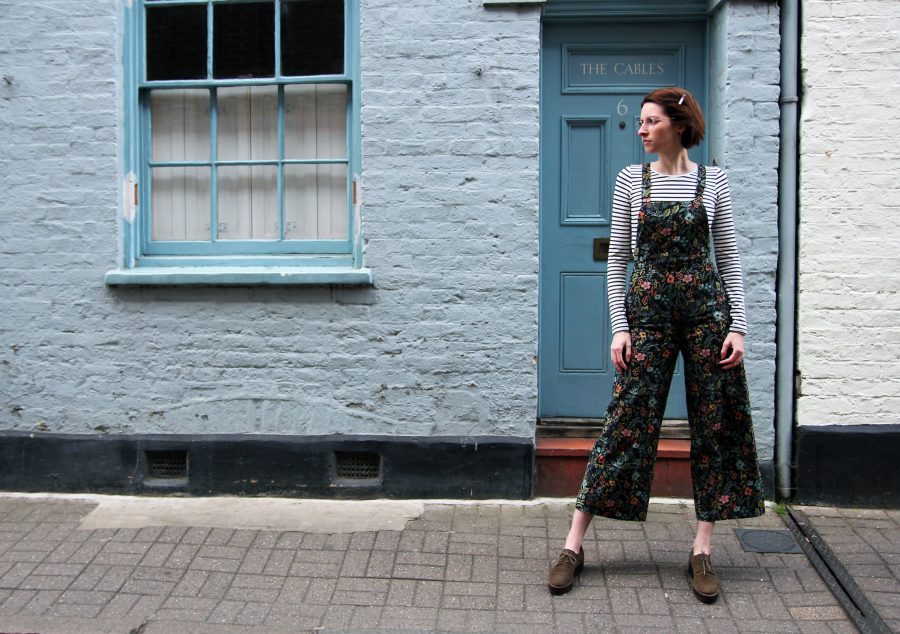
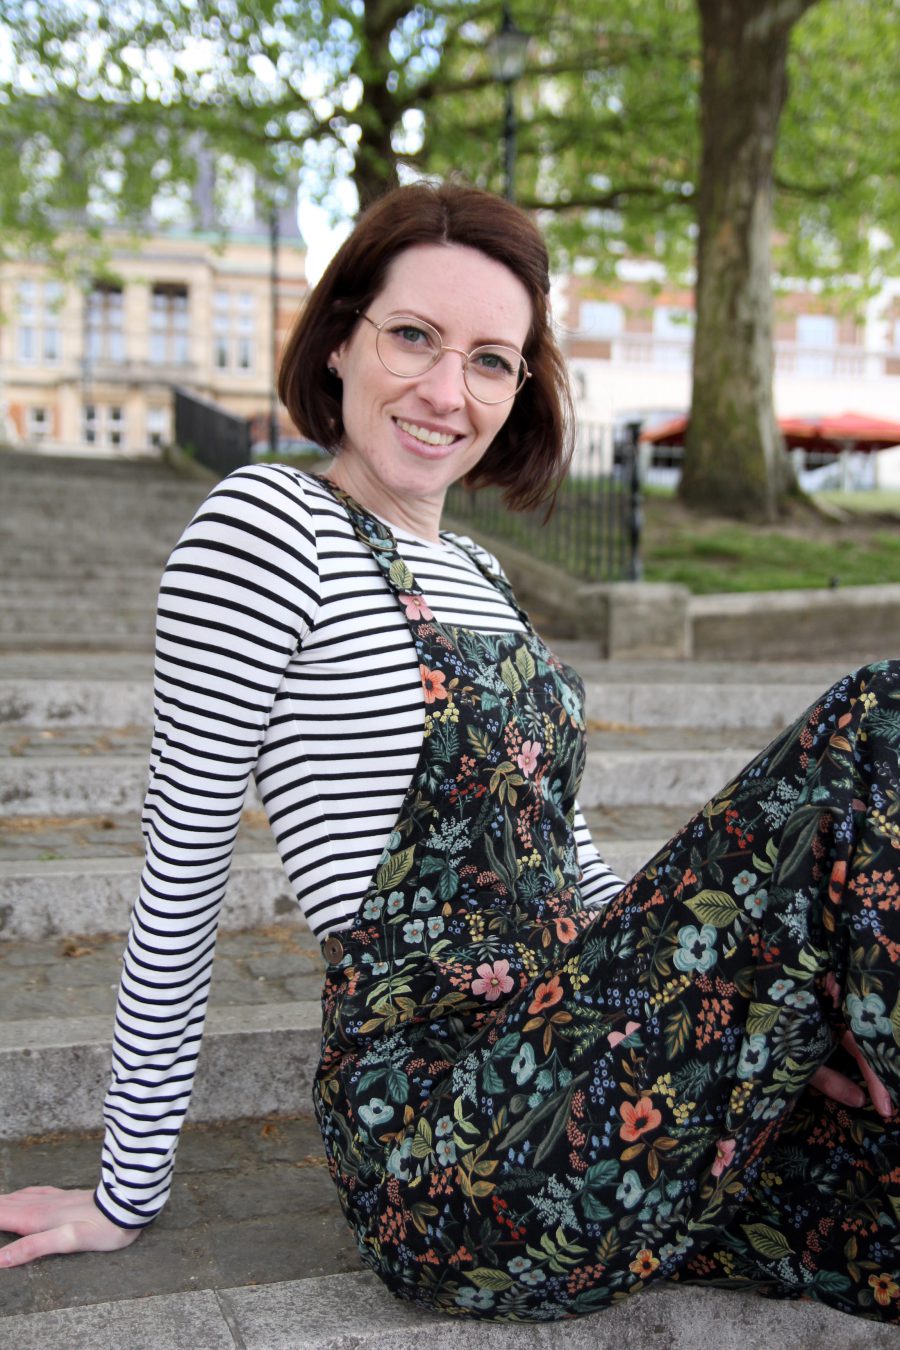
It’s been over a year since I finished making these two garments… Shall we just say ‘better late than never’ and get started? I made the Closet Case Patterns Jenny overalls and a Megan Nielsen Rowan bodysuit. I’ve worn these two together so many times since I made it, I just don’t think I’ll ever get sick of the floral and stripe combination!
Oh and before you continue, all the photos in this blog post are taken by the wonderful Alice from The Polkadot Palace. She came to visit me last year and we did a little photoshoot in Richmond, South London. It was so much fun to do, and I just love documenting my sewing journey this way!
PATTERN //
Jenny Overalls by Closet Case Patterns.
SUPPLIES //
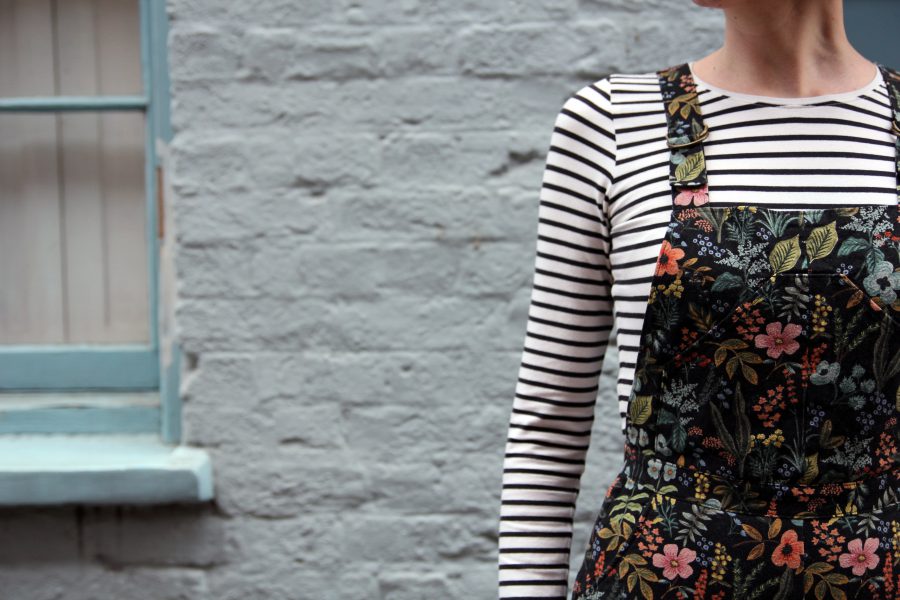
The flowery fabric (of dreams) is a cotton linen blend by Rifle Paper Co which I bought from one of my favourite online fabric shops: Sister Mintaka. For the lining I used some plain black cotton from my stash and I bought the zipper and d-rings from Jaycotts. The lovely button on the waistband is from Textile Garden.
SIZING AND CUTTING //
My bust and waist measurements were both exactly in between a size 8 and 10 and my hips measured a size 10. I ended up cutting a size 10 for the bottoms and I cut a size 8 for the bib. This worked out really well as I’m quite small at the top and I didn’t want the bib to look oversized on me.
STITCHING //
I absolutely loved making these overalls! A project like this is right up my street. It requires precise sewing, patience, top stitching and a little bit of creativity. The topstitching isn’t that visible, but it does give it a nice and crisp look.
FITTING AND ALTERATIONS //
It was my first time making this pattern so I started with a toile to see how it would fit me. I didn’t add the bib at this point. To improve the fit of the toile I made some adjustments to the crotch seam using the free e-book: Best Tips For Pants Fitting from Closet Case Patterns. Unfortunately I lost my notebook so I don’t have the exact details of the adjustments I made. But I do remember that I took the side seams and the waistband in a little bit and it’s now closer to a size 8 at the waist.
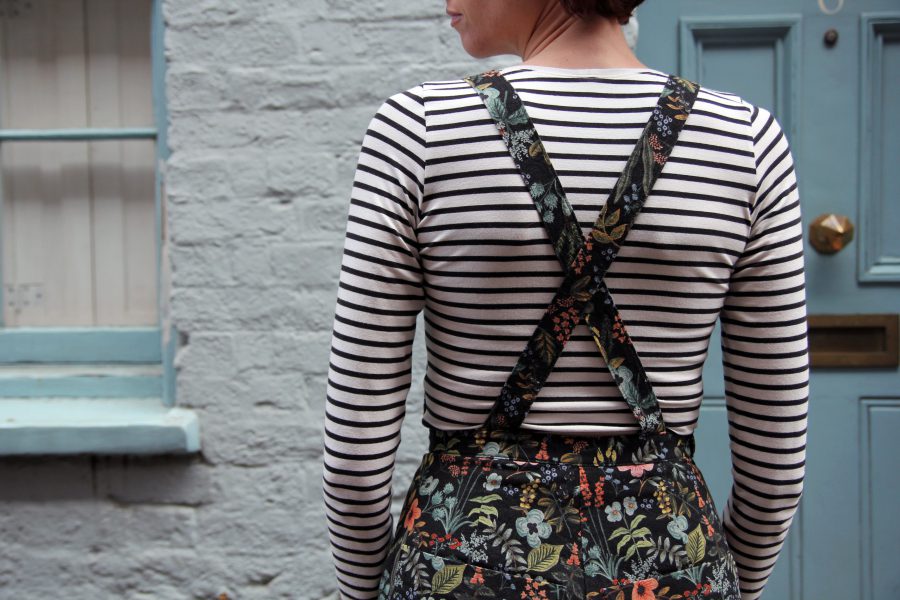
When making the bib I decided to fully line it with a plain black cotton, and I thought it was fun to use d-rings to close the straps, instead of buckles like the pattern suggests. It was a bit of a puzzle to figure out the best way to this, but I ended up adding shorter straps to the bib, and longer ones to the back. This way, once the straps are secured the ‘flaps’ face downwards and not upwards.


VERDICT //
If success was measured by the amount of times I have worn these overalls, then this make is a massive success! It’s really easy and comfortable to wear and it’s been perfect for Spring and colder Summer days. I do really enjoy wearing them, but they’re not easy to style. The flowery print is a little bit more ‘out there’ so it’s more difficult to combine with shoes and other garments. This is of course down to my own fabric choice, which I still don’t regret!
NEXT TIME //
In terms of the fit and sewing I wouldn’t do anything different next time. I would definitely use this pattern again and I would like to make a longer tapered version like Heather Lou from Closet Case Patterns did here.
PATTERN //
Rowan Bodysuit by Megan Nielsen.
SUPPLIES //
I used a black and white striped lightweight knit fabric from Art Gallery Fabrics which I bought from Sew Me Something. The best thing about this fabric is that the stripes are woven into the fabric instead of printed on, and it’s also super soft. The rose gold snap fasteners and the clear elastic for the leg openings are from Guthrie & Ghani.
SIZING AND CUTTING //
I chose to make a size Small after checking my measurements in the size chart and I’m really pleased with the fit. Cutting this project took me a lot longer than ‘normal’ because I wanted to match the stripes on all the seams. It was tricky to do, the jersey kept curling up like most lightweight jerseys do, but it was totally worth it in the end.

STITCHING //
It came together easily and I loved making it. Matching all the stripes took up the most time, as I put a pin through every single stripe before I stitched the front and back piece together! I used a ballpoint needle size 70 to stitch it and it went really well.
FITTING AND ALTERATIONS //
This is actually the second Rowan bodysuit I’ve made for myself, and I’ve done the same alterations as my first version. I’ve added 6 centimetres to lengthen the bodice and the sleeves as I am quite tall. For this version I opted for the crew neckline and I cut the neckband in a way that only the white stripe is visible. The only other thing I did differently was to add two snap fasteners instead of three. Two do the trick just fine and you create less bulk this way.
VERDICT //
I already knew I would love my new bodysuit as I already got so much wear out of my first one. They’re the best wardrobe staples, go with a lot of things in my wardrobe and I find them extremely comfortable to wear. I am a complete bodysuit convert and the idea of never having to tuck in a top is the dream!
NEXT TIME //
It must be clear by now that I would like to make at least 10 more Rowan’s. I wouldn’t change anything about the fit I would just like to try out the other variations that are included with the pattern.
So that’s it! All my thoughts about my not-so-new floral overalls and stripey bodysuit. I hope you enjoyed reading this blog post. Till next time, Barbara X
Save this blog post on Pinterest for later: